Getting Started with kapp-controller
Leigh Capili & Tiffany Jernigan
kapp-controller is a tool in the open source Carvel suite.
“kapp-controller’s declarative APIs and layered approach enable you to build, deploy, and manage your own applications. It also helps package your software into easily distributable packages and enables your users to discover, configure, and install these packages on a Kubernetes cluster.”
source: carvel.dev/kapp-controller
kapp-controller gives us a flexible way to fetch, template, and deploy our applications to Kubernetes. It will also keep our apps continuously up to date when the configuration in our source repository changes.
kapp-controller utilizes kapp to track the resources it’s deploying. If you’re new to kapp, check out the Getting Started with kapp guide.
Prerequisites
Before you get started, you will need to do the following:
- Create a Kubernetes cluster
- Install
kubectllocally - Install the latest
kapp,ytt, andimgpkgCLIs via one of these options:- Homebrew
If you’ve installed them viabrewpreviously, please run the following anyway to update:brew tap vmware-tanzu/carvel brew install kapp ytt imgpkg - Download the binaries from GitHub releases and move them to
/usr/local/binor add to your$PATHand runchmod +xto make them executable.
- Homebrew
- Install kapp-controller in the cluster:
Since we are bootstrapping the kapp-controller installation with kapp, it will wait for the controller to download, run, and become healthy. If this command completes successfully, we are good to continue.kapp deploy -a kc -f https://github.com/vmware-tanzu/carvel-kapp-controller/releases/latest/download/release.yml -y
Main Use Cases
kapp-controller has three primary use cases, which we will talk about in this guide:
- Continuous Delivery
- Package Consumption
- Package Authoring
Continuous Delivery
Fork/Clone
This guide stores all of its configuration in a Git repository. It’s possible to use other sources, such as an imgpkg bundle or regular container images, http, or a Helm registry as well. For this walkthrough, you will want to clone your own copy of the repo.
git clone https://github.com/vmware-tanzu-labs/tdc-carvel-examples.git
cd tdc-carvel-examples
Optionally, fork the repository first before you clone, so that you can make your own updates to the cluster and see kapp-controller update your application. Should you fork the repository, replace the references to the upstream repo to your own:
UPSTREAM=https://github.com/vmware-tanzu-labs/tdc-carvel-examples
FORK=https://github.com/<YOUR-USERNAME-HERE>/my-kapp-repo

git grep -l $UPSTREAM | xargs sed -i -e "s,$UPSTREAM,$FORK,g"

git diff
git commit -a "Update Apps for fork"
git push
Setup
First, we will manually create an administrative, management Namespace called apps-mgmt.
We will use this Namespace to create other Namespaces for the applications to reside in as well as ServiceAccounts and RoleBindings so that those applications can be deployed with restricted permissions.
To take a look at the apps-mgmt cluster-admin Namespace and RBAC, you can run the following:
ytt -f ns-rbac --data-values-file apps-mgmt.values.yaml
apiVersion: v1
kind: Namespace
metadata:
  name: apps-mgmt
---
apiVersion: v1
kind: ServiceAccount
metadata:
  name: kapp-cluster-admin
  namespace: apps-mgmt
---
kind: ClusterRoleBinding
apiVersion: rbac.authorization.k8s.io/v1
metadata:
  name: kapp-cluster-admin
subjects:
- kind: ServiceAccount
  name: kapp-cluster-admin
  namespace: apps-mgmt
roleRef:
  apiGroup: rbac.authorization.k8s.io
  kind: ClusterRole
  name: cluster-admin
ytt is the YAML Swiss Army knife!
We’ll need to create a lot of Namespaces, ServiceAccounts, and RoleBindings – ytt allows us to reuse the same code to do so with different options.
Check out the ytt program in the./ns-rbacdirectory.To learn more about ytt, check out our Getting Started with ytt guide.
Now, deploy the apps-mgmt Namespace and RBAC with ytt and kapp:
kapp deploy -a apps-mgmt \
-f <(ytt -f ns-rbac --data-values-file apps-mgmt.values.yaml)
Hit y to continue and create the following resources:
Namespace  Name                Kind                Conds.  Age  Op      Op st.  Wait to    Rs  Ri
(cluster)  apps-mgmt           Namespace           -       -    create  -       reconcile  -   -
^          kapp-cluster-admin  ClusterRoleBinding  -       -    create  -       reconcile  -   -
apps-mgmt  kapp-cluster-admin  ServiceAccount      -       -    create  -       reconcile  -   -
We are using kapp to track these resources since they are not managed by kapp-controller.
Next, we want to have our applications be in the dev and test namespaces.
Using our new apps-mgmt namespace, we can ask kapp-controller to create them for us along with namespace-level ServiceAccounts for installing the namespaced web applications.
We will add two App Custom Resources to the apps-mgmt namespace:
# kapp-controller/ns-rbac/ns-rbac-dev.yaml
apiVersion: kappctrl.k14s.io/v1alpha1
kind: App
metadata:
  name: ns-rbac-dev
  namespace: apps-mgmt
spec:
  serviceAccountName: kapp-cluster-admin
  fetch:
    - git:
        url: https://github.com/vmware-tanzu-labs/tdc-carvel-examples
        ref: origin/main
        subPath: ns-rbac
  template:
    - ytt: {}
  deploy:
    - kapp: {}
# kapp-controller/ns-rbac/ns-rbac-test.yaml
apiVersion: kappctrl.k14s.io/v1alpha1
kind: App
metadata:
  name: ns-rbac-test
  namespace: apps-mgmt
spec:
  serviceAccountName: kapp-cluster-admin
  fetch:
    - git:
        url: https://github.com/vmware-tanzu-labs/tdc-carvel-examples
        ref: origin/main
        subPath: ns-rbac
  template:
    - ytt:
        inline:
          paths:
            values.yaml: |
              #@data/values
              ---
              namespace: test
  deploy:
    - kapp: {}
We see in these two Apps that they fetch from the ns-rbac subPath of the vmware-tanzu-labs/tdc-carvel-examples GitHub repo.
(If you forked the repo and did the find and replace, you should see your repo here instead.)
The first App manages the dev Namespace and RBAC.
The second App uses the same ytt program. However, the template section has an inline ytt value that changes the manifests to create the test Namespace and RBAC instead.
We can deploy these two namespace-managing apps like so:
kubectl apply -f kapp-controller/ns-rbac
kapp-controller will then fetch the GitHub repo, template the subPath for us using ytt with different values per-App, and then create the Namespaces for us.
We can see the status of these Apps with kubectl:
kubectl -n apps-mgmt get apps
NAME           DESCRIPTION           SINCE-DEPLOY   AGE
ns-rbac-dev    Reconcile succeeded   4s             5s
ns-rbac-test   Reconcile succeeded   4s             5s
Since kapp-controller uses kapp internally, you can also see the raw kapp state with the kapp CLI.
These will also have the suffix “-ctrl” to show that they are managed by kapp-controller.
kapp -n apps-mgmt ls
Name               Namespaces      Lcs   Lca
ns-rbac-dev-ctrl   (cluster),dev   true  49s
ns-rbac-test-ctrl  (cluster),test  true  49s
Since these Apps are in the apps-mgmt Namespace, their resources are reconciled to the cluster with the apps-mgmt/kapp-cluster-admin ServiceAccount.
By default, the kapp state namespace will match the namespace of each App Custom Resource.
These apps are tracking a branch in git, so if the git repository updates, kapp-controller will make any necessary changes to the Namespace and RBAC definitions.
Plain YAML
Now that the Namespaces and RBAC are set up, we can have kapp-controller deploy our web application.
This example has a Deployment and Service for the Spring PetClinic application.
We can take a look at the manifest here:
cat app-plain/spring-petclinic.yaml
Here is where kapp-controller comes in with this application. We are creating a resource of kind App. It fetches the code we just looked at from GitHub and then uses the ServiceAccount dev/kapp-ns-admin that we created previously to create the resources.
apiVersion: kappctrl.k14s.io/v1alpha1
kind: App
metadata:
  name: spring-petclinic
  namespace: dev
spec:
  serviceAccountName: kapp-ns-admin
  fetch:
  - git:
      url: https://github.com/vmware-tanzu-labs/tdc-carvel-examples
      ref: origin/main
      subPath: app-plain
  template:
  - ytt: {}
  deploy:
  - kapp: {}
Now, let’s create the App:
kubectl apply -f kapp-controller/apps/spring-petclinic-plain-dev.yaml
Now we can check the App object with kubectl.
Run Ctrl-C when it finishes reconciling.
kubectl -n dev get apps -w
NAME                     DESCRIPTION           SINCE-DEPLOY   AGE
spring-petclinic   Reconcile succeeded   14s            15s
To see it working, we can port-forward the service.
kubectl -n dev port-forward svc/spring-petclinic 8080:80
Now, if you open localhost:8080 in your browser, you should see the following page:
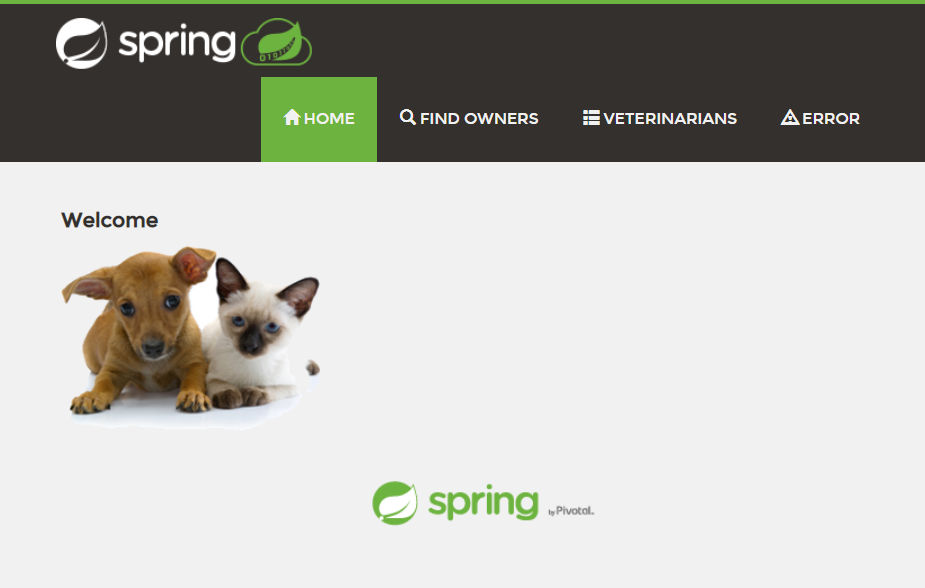
We can end the port-forward with Ctrl-C.
To see the App we created, we can run we can use kubectl to look at it:
kubectl -n dev get app spring-petclinic -o yaml
We can find the managed App that kapp-controller created, spring-petclinic-ctrl, in the dev state namespace:
kapp -n dev list
Name                   Namespaces  Lcs   Lca
spring-petclinic-ctrl  dev         true  2m
We can use kapp inspect on this App and it will show us the same resources above:
kapp -n dev inspect -a spring-petclinic-ctrl
Namespace  Name                              Kind           Owner    Conds.  Rs  Ri  Age
dev        spring-petclinic                  Deployment     kapp     2/2 t   ok  -   1m
^          spring-petclinic                  Endpoints      cluster  -       ok  -   1m
^          spring-petclinic                  Service        kapp     -       ok  -   1m
^          spring-petclinic-5b4mq            EndpointSlice  cluster  -       ok  -   1m
^          spring-petclinic-b5976f9dd        ReplicaSet     cluster  -       ok  -   1m
^          spring-petclinic-b5976f9dd-fskp8  Pod            cluster  4/4 t   ok  -   1m
To see more details, you can add the --status flag:
kapp -n dev inspect -a spring-petclinic-ctrl --status
To see all of the Apps you currently have, run the following:
kapp list -A
Namespace  Name                   Namespaces                             Lcs   Lca
apps-mgmt  ns-rbac-dev-ctrl       (cluster),dev                          true  14m
^          ns-rbac-test-ctrl      (cluster),test                         true  14m
default    apps-mgmt              (cluster),apps-mgmt                    true  16m
^          kc                     (cluster),kapp-controller,kube-system  true  17m
dev        spring-petclinic-ctrl  dev                                    true  5m
If you forked the repository, you can make a change, such as adding another label in
kapp-controller/apps/spring-petclinic-plain-dev.yaml. After you push a new commit up, kapp-controller will update your application with the new change. You will be able to see that the update happened if you usekapp inspectto check the status as well as checking the resource withkubectl.
ytt
Earlier, we saw how ytt was used for templating for Namespace and RBAC creation. In this example, we are going to use a ytt-templatized version of the Spring PetClinic Deployment and Service manifest.
To take a look at the files, you can look in the app-ytt directory.
We can see that the output file is identical to what we had (there won’t be any output).
ytt -f app-ytt > /tmp/app-ytt.yaml
diff /tmp/app-ytt.yaml app-plain/spring-petclinic.yaml
We are also going to change the Namespace from dev to test using inline ytt like we did with the Namespace and RBAC creation.
apiVersion: kappctrl.k14s.io/v1alpha1
kind: App
metadata:
  name: spring-petclinic
  namespace: test
spec:
  serviceAccountName: kapp-ns-admin
  fetch:
    - git:
        url: https://github.com/vmware-tanzu-labs/tdc-carvel-examples
        ref: origin/main
        subPath: app-ytt
  template:
    - ytt:
        inline:
          paths:
            values.yaml: |
              #@data/values
              ---
              namespace: test
  deploy:
    - kapp: {}
Now let’s run it.
kubectl apply -f kapp-controller/apps/spring-petclinic-ytt-test.yaml
Now we can check the App object with kubectl.
Run Ctrl-C when it finishes reconciling.
kubectl -n test get apps -w
To see it working, we can port-forward the service like we did earlier:
kubectl -n test port-forward svc/spring-petclinic 8080:80
Now, if you open localhost:8080 in your browser, you’ll see the same app as earlier.
We can end the port-forward with Ctrl-C.
We can then look at the resources here with kapp and kubectl:
kubectl -n test get app spring-petclinic -o yaml

kapp -n test inspect -a spring-petclinic-ctrl
kapp -n test inspect -a spring-petclinic-ctrl --status
To see more examples, check out the App Walkthrough in the documentation.
Package Consumption
kapp-controller can also be used for package management. We can use a package someone else created or one that we create. This can make software installation much simpler.
Let’s take a look at the software packages available for VMware Tanzu Community Edition.
If you’re using a Tanzu Community Edition cluster, you will be able to just use the tanzu CLI for installing the package repo and packages.
You’ll be able to see how to do this via the Tanzu Community Edition documentation.
apiVersion: packaging.carvel.dev/v1alpha1
kind: PackageRepository
metadata:
 name: tanzu-community-edition
 namespace: apps-mgmt
spec:
 fetch:
   imgpkgBundle:
     image: projects.registry.vmware.com/tce/main:latest
The Carvel tool imgpkg is used for bundling the package repository.
Now, create the PackageRepository Custom Resource:
kubectl apply -f package-mgmt/repository.yaml
Wait for the PackageRepository Custom Resource to be reconciled:
kubectl -n apps-mgmt get packagerepository tanzu-community-edition -w
Once it finishes, we can take a look at what packages were added:
kubectl -n apps-mgmt get packages
NAME                                                   PACKAGEMETADATA NAME                            VERSION   AGE
velero.community.tanzu.vmware.com.1.5.2                velero.community.tanzu.vmware.com               1.5.2     9m20s
cert-manager.community.tanzu.vmware.com.1.4.0          cert-manager.community.tanzu.vmware.com         1.4.0     9m20s
cert-manager.community.tanzu.vmware.com.1.5.1          cert-manager.community.tanzu.vmware.com         1.5.1     9m20s
cert-manager.community.tanzu.vmware.com.1.3.1          cert-manager.community.tanzu.vmware.com         1.3.1     9m20s
contour.community.tanzu.vmware.com.1.15.1              contour.community.tanzu.vmware.com              1.15.1    9m20s
contour.community.tanzu.vmware.com.1.17.1              contour.community.tanzu.vmware.com              1.17.1    9m20s
external-dns.community.tanzu.vmware.com.0.8.0          external-dns.community.tanzu.vmware.com         0.8.0     9m20s
gatekeeper.community.tanzu.vmware.com.1.0.0            gatekeeper.community.tanzu.vmware.com           1.0.0     9m20s
fluent-bit.community.tanzu.vmware.com.1.7.5            fluent-bit.community.tanzu.vmware.com           1.7.5     9m20s
grafana.community.tanzu.vmware.com.7.5.7               grafana.community.tanzu.vmware.com              7.5.7     9m19s
harbor.community.tanzu.vmware.com.2.2.3                harbor.community.tanzu.vmware.com               2.2.3     9m19s
knative-serving.community.tanzu.vmware.com.0.22.0      knative-serving.community.tanzu.vmware.com      0.22.0    9m19s
local-path-storage.community.tanzu.vmware.com.0.0.19   local-path-storage.community.tanzu.vmware.com   0.0.19    9m19s
local-path-storage.community.tanzu.vmware.com.0.0.20   local-path-storage.community.tanzu.vmware.com   0.0.20    9m19s
multus-cni.community.tanzu.vmware.com.3.7.1            multus-cni.community.tanzu.vmware.com           3.7.1     9m19s
prometheus.community.tanzu.vmware.com.2.27.0           prometheus.community.tanzu.vmware.com           2.27.0    9m19s
We can use kapp-controller’s PackageInstall Custom Resource to install Prometheus.
Note: Make sure the version matches one of the available versions. This may be different by the time you are following along.
apiVersion: packaging.carvel.dev/v1alpha1
kind: PackageInstall
metadata:
 name: prometheus
 namespace: apps-mgmt
spec:
 serviceAccountName: kapp-cluster-admin
 packageRef:
   refName: prometheus.community.tanzu.vmware.com
   versionSelection:
     constraints: 2.27.0
 values:
 - secretRef:
     name: pkg-demo-values
---
apiVersion: v1
kind: Secret
metadata:
 name: pkg-demo-values
 namespace: apps-mgmt
stringData:
 values.yml: |
   ---
   namespace: prometheus-addon
The field for values is optional.
You can use it to change default values in the package.
Here, we are changing the namespace from the default of prometheus to prometheus-addon.
Let’s apply the YAML:
kubectl apply -f package-mgmt/prometheus.yaml
Create an environment variable for the version:
export PROM_VERSION=2.27.0
To take a look at the values schema for this package, run the following:
kubectl -n apps-mgmt get package prometheus.community.tanzu.vmware.com.${PROM_VERSION} -o yaml
And if you want to see the specific values file used for this package, you can pull down the bundle with imgpkg and look at it.
imgpkg pull -b projects.registry.vmware.com/tce/prometheus:${PROM_VERSION} -o /tmp/prom-pkg
cat /tmp/prom-pkg/config/values.yaml
Now we can wait for the PackageInstall Custom Resource to reconcile:
kubectl -n apps-mgmt get packageinstall prometheus -w
We can use kapp to see everything that was installed for Prometheus:
kapp -n apps-mgmt inspect -a prometheus-ctrl
To fully see that it’s working, you can port-forward the service.
kubectl -n prometheus-addon port-forward service/prometheus-server 8080:80
Then open localhost:8080 in a browser.
You could type kubelet_running_pods in the search for instance to get some data.
We can end the port-forward with Ctrl-C.
To learn more about Package Consumption, check out the Package Consumption Walkthrough on the Carvel site.
Package Authoring
With kapp-controller you can turn your own applications into a package. This is especially useful so you can easily share your applications with others. For example, we could turn the Spring PetClinic application into a package.
To see how to author a package, check out the Package Author Walkthrough on the Carvel site.
Tear Down
Now we can delete the resources we’ve created.
# Remove Prometheus
kubectl delete -f package-mgmt/prometheus.yaml
# Remove package repository
kubectl delete -f package-mgmt/repository.yaml
# Delete continuous delivery app
kubectl delete -f kapp-controller/apps
# Delete apps ns/rbac
kubectl delete -f kapp-controller/ns-rbac
# Delete apps-mgmt ns/rbac
kapp delete -a apps-mgmt -y
You can also uninstall kapp-controller if you’d like:
kapp delete -a kc -y
Big Picture
We went through a lot there, especially if you’re new to the Carvel tool suite. We used four tools: kapp, ytt, imgpkg, and kapp-controller.
kapp was used to deploy our applications. ytt was used to templatize our application manifests. imgpkg was used to unbundle a package. And kapp-controller was used to fetch, template, and deploy our applications. It was also used to consume a package to install software.
We can see that kapp-controller gives us the ability to take full control over the lifecycle of our software needs on Kubernetes. With kapp-controller, we can ask our cluster to perform continuous delivery for the things we own and delegate the installation and updates of other software packages to someone we trust. kapp-controller and the rest of the Carvel toolset provide a foundation for more organized, flexible, and repeatable cloud native operations.
To learn more about Carvel, check out our other guides.