.NET Cookbook
Steeltoe Dynamic Logger
When To Use This Recipe
This recipe should be followed when .NET applications pushed to Cloud Foundry require logging levels that can be changed at runtime without requiring app restarts.
Overview
Logging is one of the most critical aspects of a modern application’s stack of cross cutting concerns. This is because Logging, as a feature, serves many audiences and many use-cases. In times of “business as usual”, logging can be used to glean summary data regarding request volume, average response times, and other helpful data points that drive both operational excellence and executive decision making. When troubleshooting production environments, log data is often our first line of defense.
The rub is, each of the above use-cases and audiences often require different levels of granularity from logging. The same feature must support multiple perspectives. Leaving logging in a detailed mode at all times would make troubleshooting easier but would place a drag on performance and increase costs for log storage, while logging too coarsely omits crucial information required to trace down complex issues in code. It makes sense, therefore, that we want a way to adjust the amount of detail provided by our logging solution, and it also makes sense that we’ll want to accomplish these adjustments without restarting our deployed applications, perhaps flushing out the source of any transient defective behavior.
Thankfully, Steeltoe makes runtime adjustment of logging levels possible within a .NET application. These adjustments are initiated by authorized operators via the Apps Manager, as long as dynamic logging is configured for the target app. Because Steeltoe’s Dynamic Logging is implemented as an Actuator, no additional installations are required in Apps Manager to follow this recipe.
Step by Step
1. Add Dependencies
Add the following Nuget dependency to your project:
Steeltoe.Extensions.Logging.DynamicLoggerversion2.2.1
2. Configure Logging
Use a LoggerFactory to configure logging. A boilerplate setup is shown below; see the official .NET Core Logging documentation for a deeper dive on available configuration options:
public class Program
{
    public static void Main(string[] args)
    {
        CreateWebHostBuilder(args).Build().Run();
    }

    public static IWebHostBuilder CreateWebHostBuilder(string[] args) =>
        WebHost.CreateDefaultBuilder(args)

            .UseCloudFoundryHosting()
            .AddCloudFoundry()

            .ConfigureLogging((builderContext, loggingBuilder) =>
            {
                // Set logging configuration based on values in Logging config section
                loggingBuilder.AddConfiguration(builderContext.Configuration.GetSection("Logging"));

                // Add console and debug logging providers
                loggingBuilder.AddConsole();
                loggingBuilder.AddDebug();
            })

            .UseStartup<Startup>();
}
3. Add Steeltoe’s Dynamic Logger Provider
Within the inline delegate provided to ConfigureLogging, add a call to Steeltoe’s AddDynamicConsole() extension method:
public class Program
{
    public static void Main(string[] args)
    {
        CreateWebHostBuilder(args).Build().Run();
    }

    public static IWebHostBuilder CreateWebHostBuilder(string[] args) =>
        WebHost.CreateDefaultBuilder(args)

            .UseCloudFoundryHosting()
            .AddCloudFoundry()

            .ConfigureLogging((builderContext, loggingBuilder) =>
            {
                // Set logging configuration based on values in Logging config section
                loggingBuilder.AddConfiguration(builderContext.Configuration.GetSection("Logging"));

                // Add console and debug logging providers
                loggingBuilder.AddConsole();
                loggingBuilder.AddDebug();
                // Add steeltoe dynamic logging provider
                loggingBuilder.AddDynamicConsole();
            })

            .UseStartup<Startup>();
}
4. Log in to AppsManager
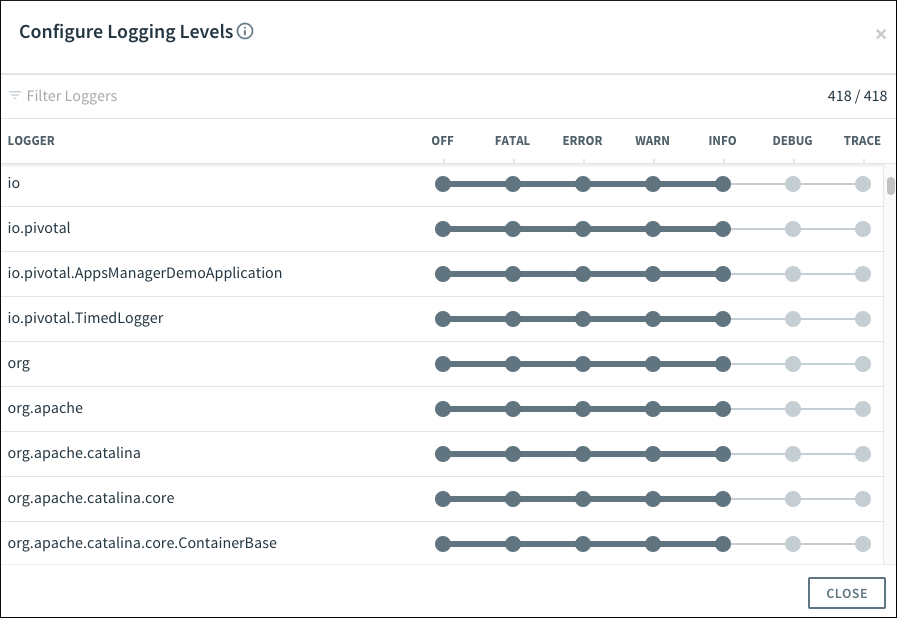
Once the above code has been added to your application and pushed to Cloud Foundry, the Logging Actuator Endpoint will be detected by Cloud Foundry as enabled for the application; a button entitled Configure Logging Levels should appear in the upper-right hand side of the logging screen. Click this button to toggle the granularity at which the application logs; no restart is required for the app instance(s).

The below example depicts the logging categories and their configured levels for a sample application:
Experiment
Once dynamic logging has been added to your application, try adding new filters and categories to your application’s logging configuration. Toggle the various logging levels and tail your application’s logs to see the impact. Understanding the experience your operators will have with dynamic logging available can inform your perspective as you plan out the logging strategy for your application.